ORACLE Lighting Ford Bronco Off-road Laser and LED Fog Light Kit Installation
Terry Pritchard
Staff Writer
The speed of light is 186,000 miles per second, and it never fails that somehow, driving at night our vehicles can sometimes “outrun” the light from our headlights or auxiliary lights due to the limitations of the light field of these lights.
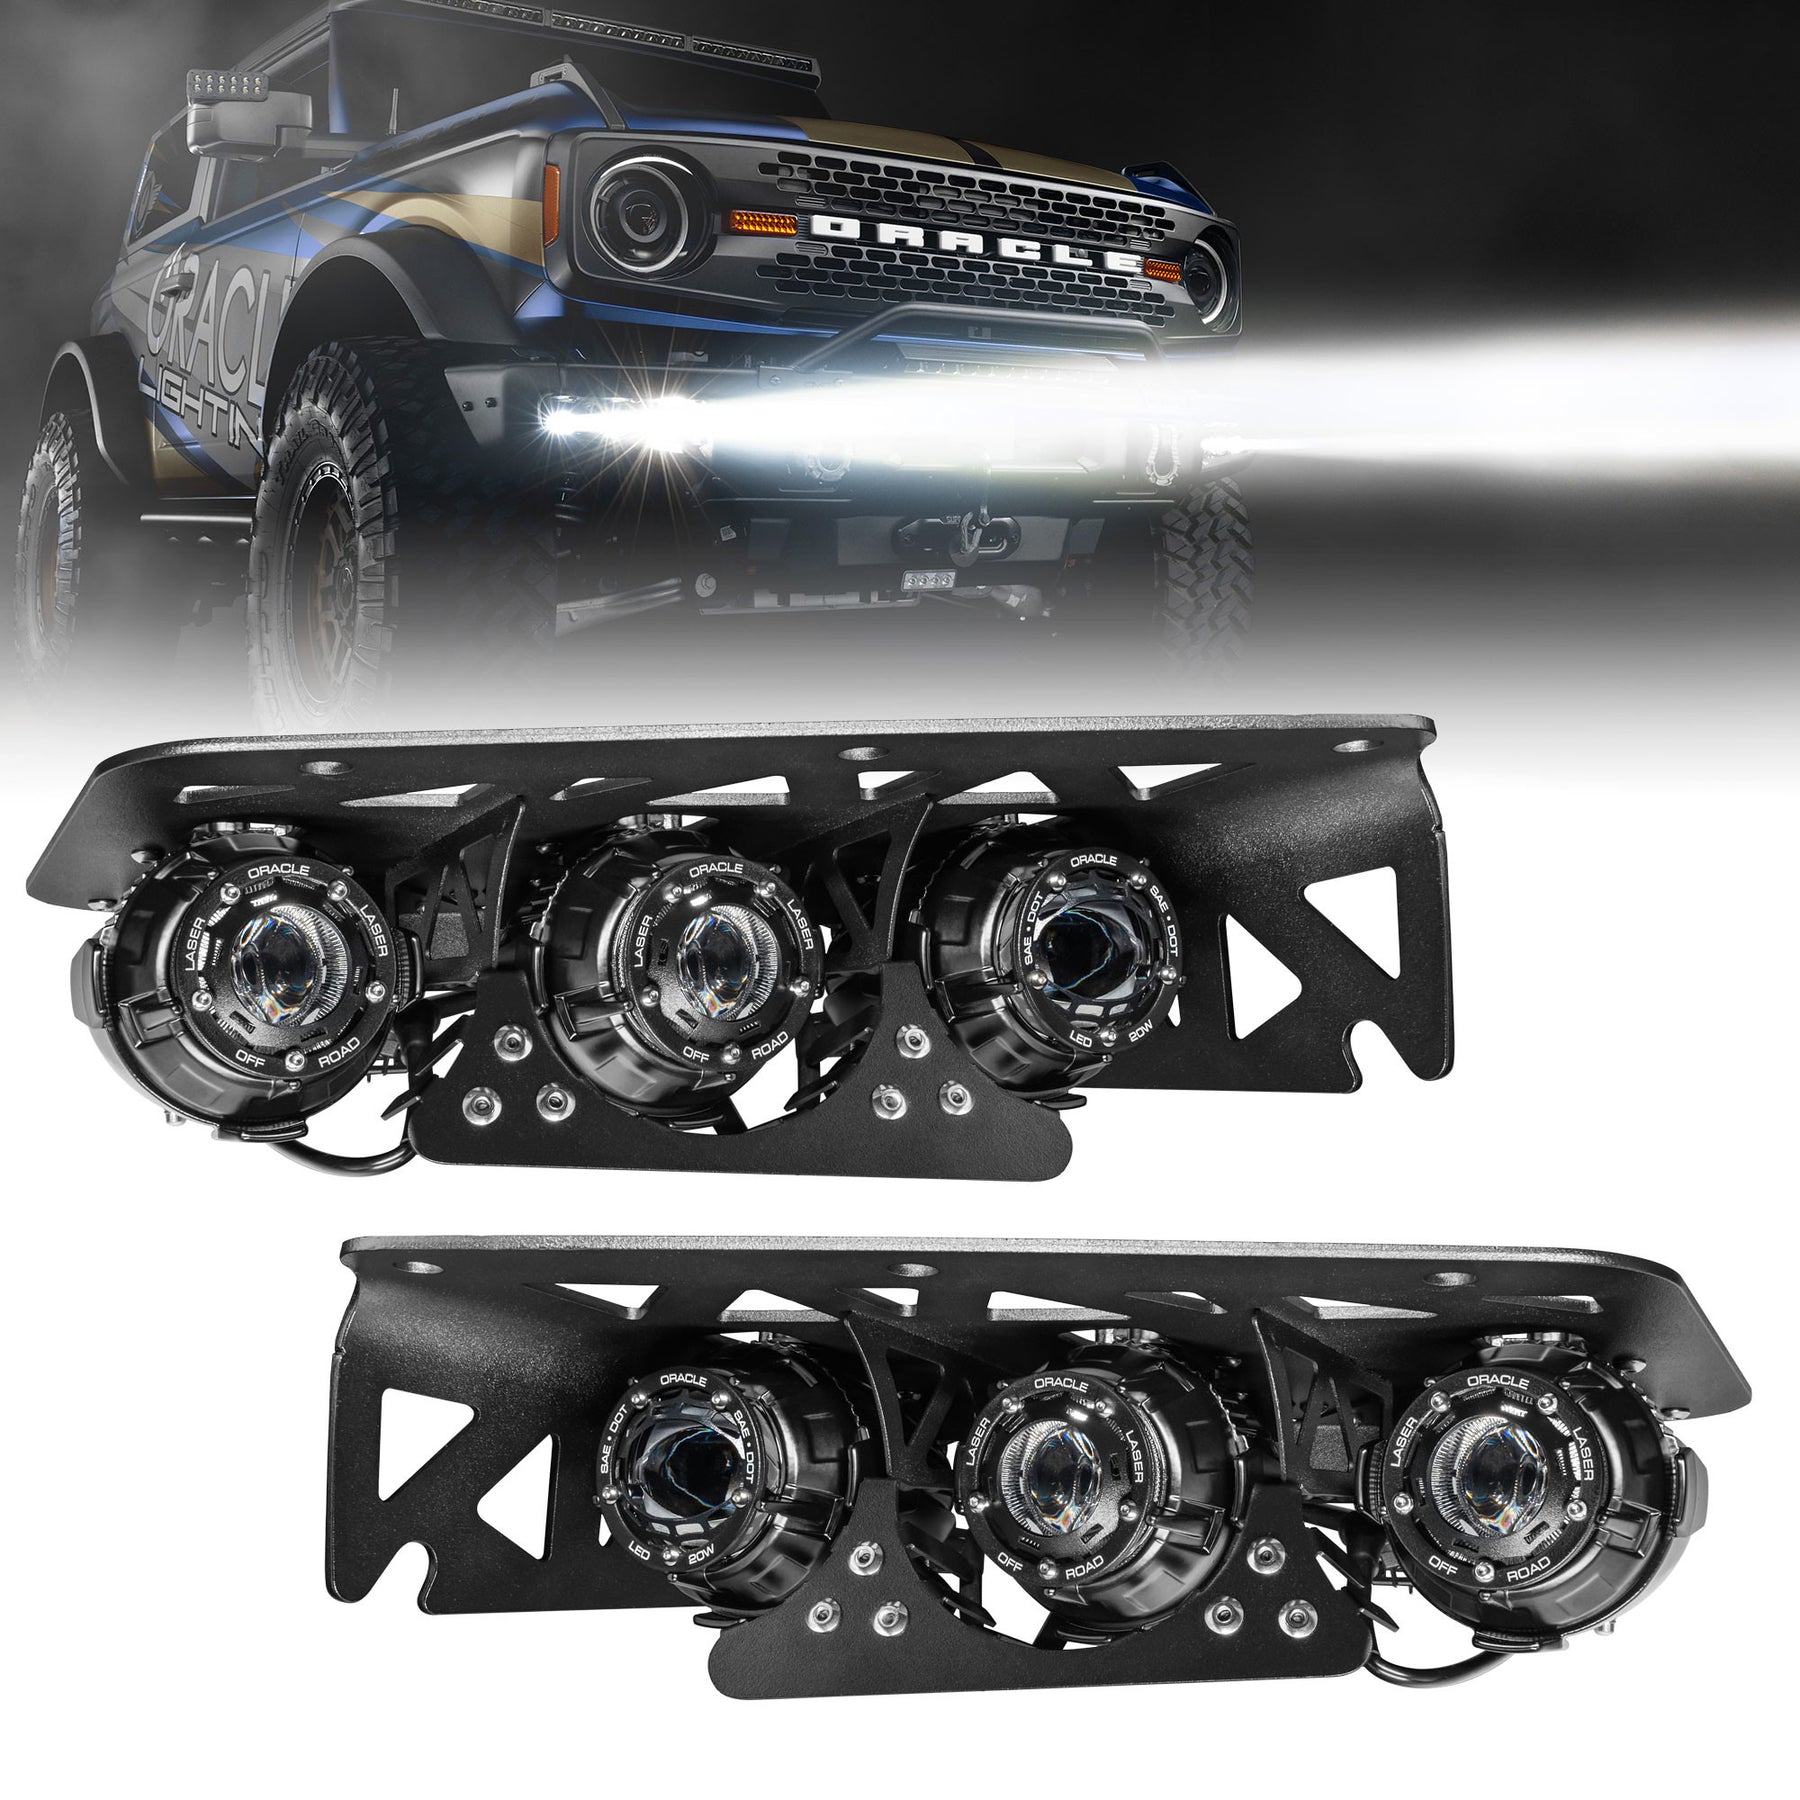
To increase safety when driving off-road or non-traditional roadways at night, Oracle Lighting has developed the Oracle Lighting Off-Road Laser Auxiliary Lights plus LED Fog Light Kit for Steel Bumper for the 6th Generation Ford Bronco. This innovative combination was developed to increase the lighting in adverse weather conditions while a separate pair of Laser diodes produce a hyper-focused beam which throws light over 3,000 feet away.
Although this seems complicated, sophisticated, and innovative (it is) but the installation is not complicated. Before beginning the installation process, gather all the necessary materials and tools. You'll typically need: A T40 Torx, 10mm Socket, Ratchet, flat head screwdriver or trim tool, and maybe a Phillips head screwdriver.
Locate the two shackle mount points on the front of the bumper. Each will have a plastic trim panel around it held in place by two trim panel clips each. Using a trim removal tool or flat blade screwdriver, remove the trim panel clips. One of the clips on each side is recessed. That might require the trim piece to be pulled back slightly to start the clip out of its secured spot. Note the size and location of each retainer clip for re-assembly. Leave the trim piece slightly pulled out allow for easier access to the T40 Torx bolts in the empty space of the bumper.
Remove the three (3) T40 bolts from the upper portion of the empty space and the fourth longer T40 on the inside face near the plastic trim. Once the bolts are removed, orient the Laser Fog light assembly with the skeletal frame positioned on the top and with the folded down section toward the center of the vehicle. Slide the entire module into position through the opening from behind the bumper. Once in place, align the holes in the frame of the light with the holes in the bumper. Finger tighten a shorter T40 bolt in the outermost hole and the longer T40 bolt in the side hole to correctly align the module. Re-install the remaining T40 bolts and tighten each one securely. Re-secure the plastic trim piece and insert the two trim retainers. Repeat these steps for the other side of the vehicle. This is the completed physical installation.
Wiring: Please note that the inside DOT fog light is wired separately from the outer two fog lights on each module. The laser fogs are not DOT approved on-road use and should only be used for off-road applications.
Each module will have two Deutsch-type connectors. One connector with blue and black connector wires for the LED fog lights and one connector with red and black for the off-road LED laser emitters. Wire each whip to an aux/up-fitter for your vehicle. Red wire for Aux 1 and black to a ground while the blue wire will connect to Aux 2 and black again to a ground. If your vehicle is not equipped with Auxiliary switches, then purchase two of the Switched LED Wiring Harness – 2 Pin Deutsch (Oracle Part Number 2088-504-2). The Bronco has a grommet along the firewall that will allow you to run these longer switches into the interior.
Test the lights before completing the install and cleaning up the wiring. Once testing is complete, secure any loose wiring with zip ties, ensuring that all connections are well-protected. Tuck the wiring away from any moving parts or hot surfaces.
Each light emitter has an aiming mechanism that adjust the height. There are three dials on each module. Use a 10mm socket to adjust the beam height as needed. If a 10mm socket does not fit, adjustments may be done with a Phillips head screwdriver inserted and turn using the gear teeth on each dial.
Proper alignment and height should be checked on a flat surface with a wall that is 25 feet away from the front of the vehicle. Measure from the ground to the center of the emitter at the vehicle. Mark a spot on the wall at 1” below that measurement. Adjust each beam so that the beam pattern touches at the bottom of that mark. This will insure maximum light on the road and the best visibility with minimal glare.
These lights are a powerful tool for that high-speed off-road adventure. The buy understands and acknowledges that the laser function of this light is not intended for road use and will only use in an appropriate manner off-road. Buyer is solely responsible for any claims arising out of Buyer’s non-compliance with this provision.
Check out the full installation video below!
Jeepin’ Terry is the Events & Offroad Guru for Oracle Lighting. In his spare time, he is the host of the Jeep Life Podcast and co-founder of the Jeep Enthusiasts of Eastern Pennsylvania, one of the largest Jeep clubs in the state. His obsession with Jeeps started in the 80s with his boss’s big bad blue CJ5. Growing up in the mountains of Tennessee, Terry spent plenty of time on the trails and in the outdoors. His 2017 Wrangler, named Kylo, has been to California and back and everywhere in between, finding trails and adventures everywhere… and constantly asks for more.
